

If you have been following me on Instagram you may have noticed that I have mentioned the Makeful community and Makeful TV a number of times. I was one of the first maker's to join the Makeful community last year and I have been encouraging all of my creative friends to sign up and join Makeful.

I recently received a simple cotton canvas tote bag in the mail from Makeful. Their logo was screen printed in the bottom corner of the bag and it came with a note inviting me to have some fun with the bag and transform it into something beautiful ... and so I did.

I spent a long time figuring out what I wanted to do with my bag. I knew I my direction would be something floral design with a creative quote but I wasn't sure what medium I wanted to use on my bag. Should I paint? Or maybe, sew? Or add an image using iron on transfers?
I ended up doing a little bit of everything and I'm pretty happy with my final tote bag.

I started off by painting a quote with Martha Stewart's gold glitter paint. I should tell you that I added Martha Stewart's tintable fabric medium to all of my paints in this project.
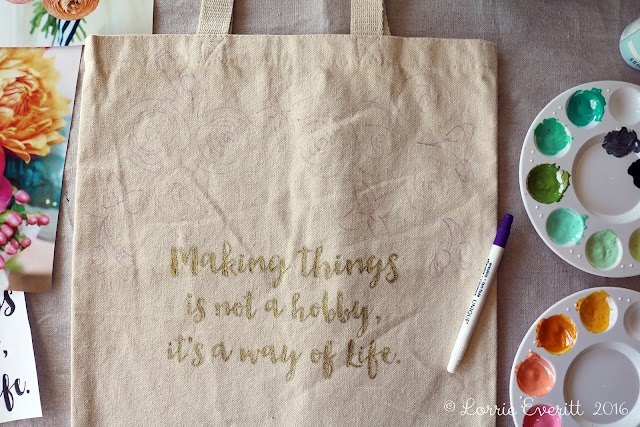
Next I used a disappearing fabric pen to roughly draw out my flowers before I started painting my overall design.
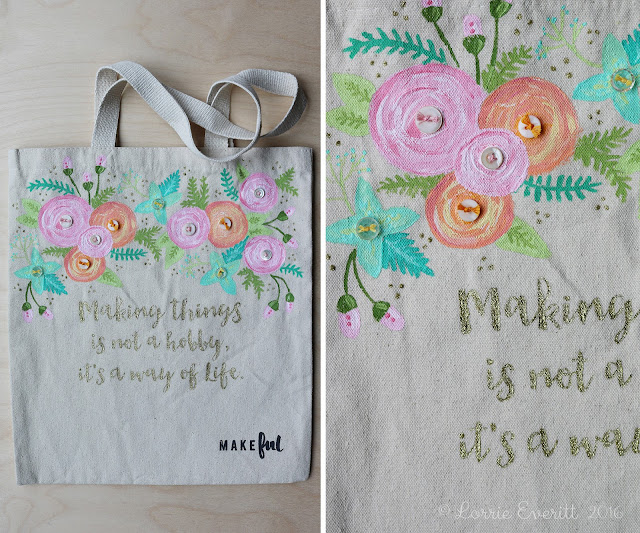
I wanted my floral design to be colourful and fun. I created a cup sleeve a little while ago for my reusable Starbucks cup which you can see in the first photo, and it was the inspiration for my colours on the bag.

After painting the flowers I decided to sew some of my vintage buttons to the bag using different colours of embroidery floss for visual interest and for a surprise functional reason. You see I could not stop at just decorating the outside of the bag. I had to add some details to the inside of the bag as well.

I added a felt pocket inside the bag to store smaller items like pencils and business cards. I also added an iron on transfer as a label so everyone would know that I created the bag.

Above you can see my felt pocket and flowers before I added them to the inside of the bag.

I sewed two large buttons inside the bag to hold the pocket. I sewed two button holes on the felt pocket. Once the pocket was attached to the inside buttons, I wanted to make sure that the pocket did not fall off the buttons easily, so I cut out two felt flower shapes with tight button holes and placed them as shown (above bottom right).

And now I'm off to enter my tote bag to the Makeful weekly challenge. If you sign up to be part of the Makeful community you can enter the weekly challenges as well or just check it out for inspiration! Either way, get ready to be inspired.
You can check out more totebags from this weekly challenge at #toteallymakeful #bemakeful.


It's really cute Lorrie! You can never have enough tote bags, right? I love all your little details. Good luck in the challenge!
ReplyDeleteThanks Andrea!
DeleteThanks Andrea!
DeleteHow were you able to trace the letters onto the bag, it looks awesome!
ReplyDeleteI used transfer paper in a dark colour to trace out my lettering before I added the glitter paint. You can buy transfer paper from most fine art stores.
Delete